The Project
The BearExxa (Bear EXtruder and X-Axis) is an alternative tool head1 and X-axis for Prusa i3 printers. It is designed to improve print quality, accuracy, reliability and makes maintenance easier. While it is an addition to the Bear Frame Upgrade project it is also compatible with Original Prusa’s MK2.5(S)(S+) and MK3(S)(S+) frames.
BearExxa 1.0
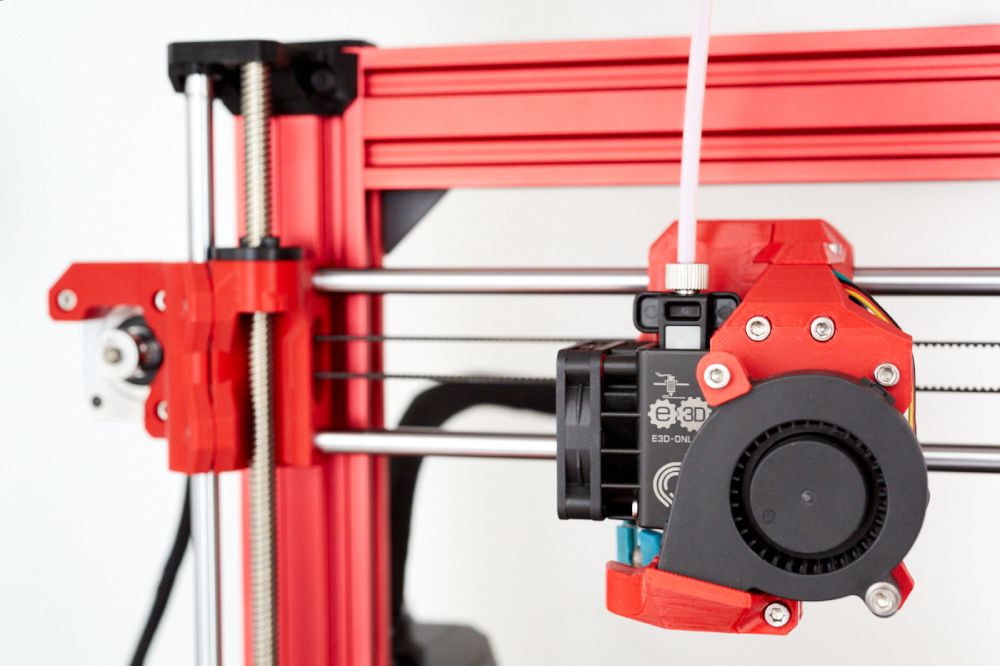
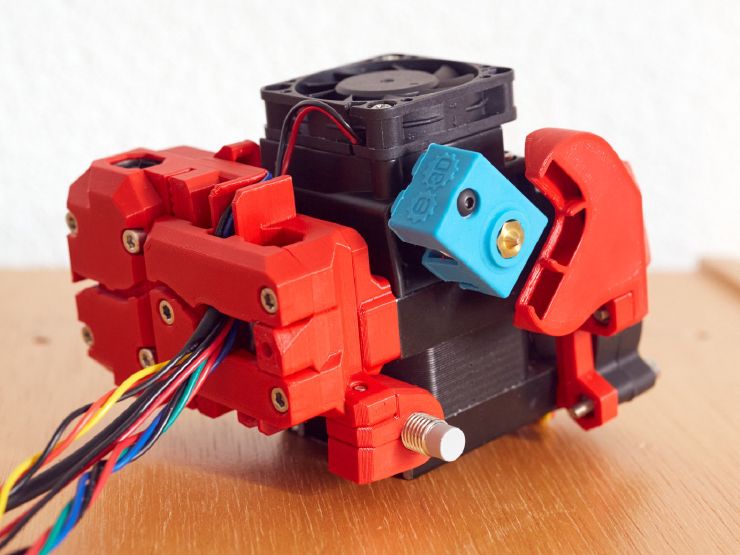
This first version was created in an attempt to improve the print quality and reliability of the Original Prusa MK3 extruder (e.g.: 602 issue). The BearExxa 1.0 fixed many issues, such as inefficient hotend and nozzle cooling, an inaccurate belt path, a reduced nozzle fan lifetime, misalignment of the filament path and extruder body melting. The open-source community was also immensely helpful, and this would not have been possible without the sharing of knowledge and collaborative learning. In addition to resolving issues, I have improved usability by adding a split carriage cover, providing easy access to the filament sensor, and offering an optional reverse Bowden. Careful work on tolerances and refinements also contributes to improved usability.
BearExxa 1.0 tool head
BearExxa 1.0 with the lid to access the hobb gears open
Tool head carriage with two parts for better usability
Internal mechanism of the filament sensor
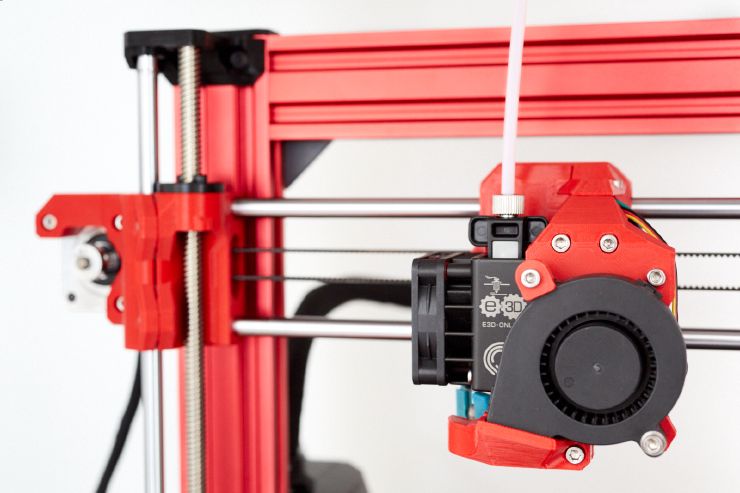
As the name suggests, the aim of this project was also to have a better X-axis. Thanks to Z-bearing clamps, reinforced printed parts and reduced X-motor arm leverage, the Bear X-axis has increased rigidity. Furthermore, the reducing of the momentums present in the original belt path makes the the motion smoother. Finally, usability has been greatly enhanced by the addition of a belt tensioner and careful attention to tolerances.
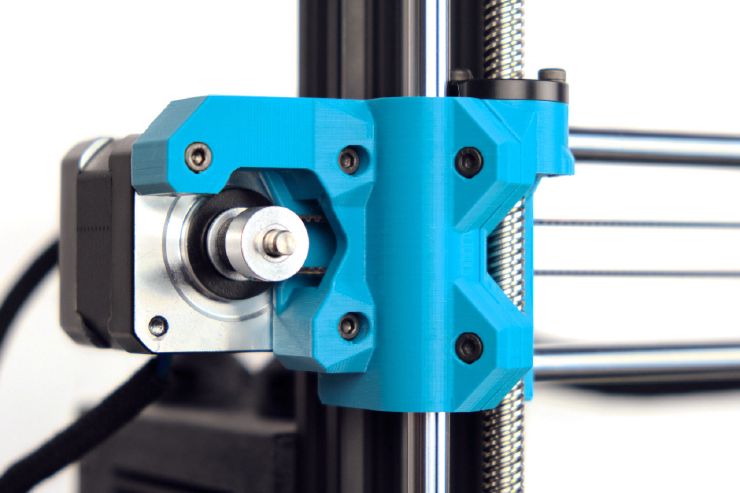
Bear X axis motor mount. (Photo by Florian Däubler)
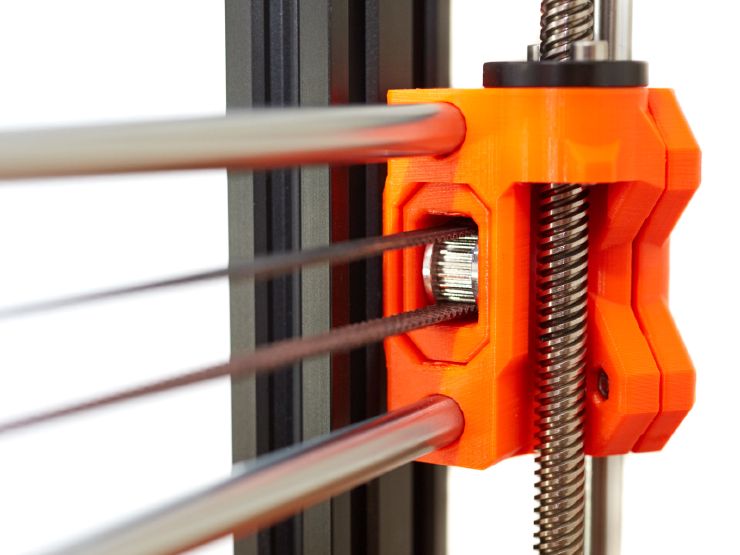
Bear X axis belt tensioner
Many of the BearExxa V1 fixes were later found on the original Prusa extruder and X-axis in one form or another. Even the new Prusa MK4 incorporated some of them, such as the Z bearings clamps.
Bondtech and E3D
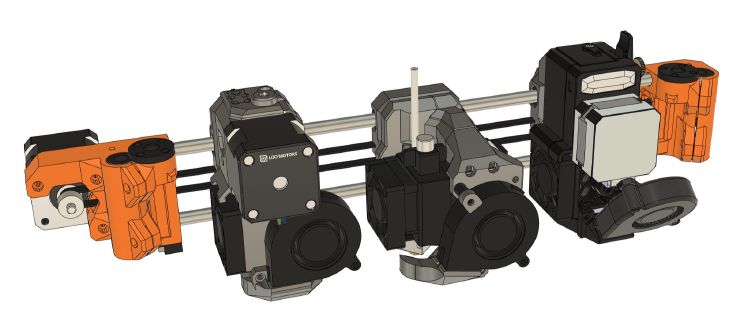
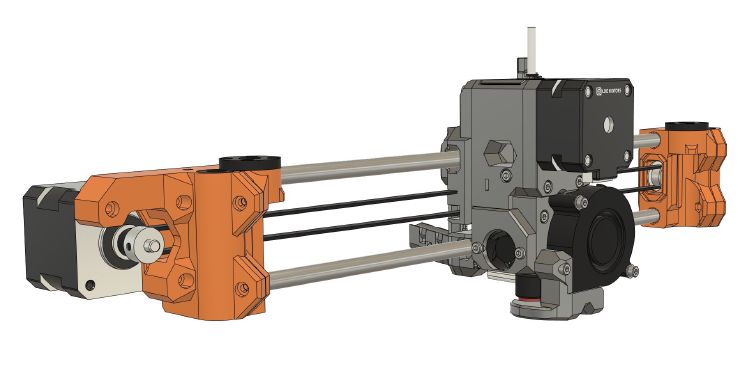
The popularity of the BearExxa V1 led to me being contacted by Bondtech, who wanted to make their Prusa upgrade BMG extruder compatible with the Bear X-axis. I also helped the Bondtech engineering team refine their extruder design before its official release, focusing on hotend compatibility and airflow, tolerances, and assembly.
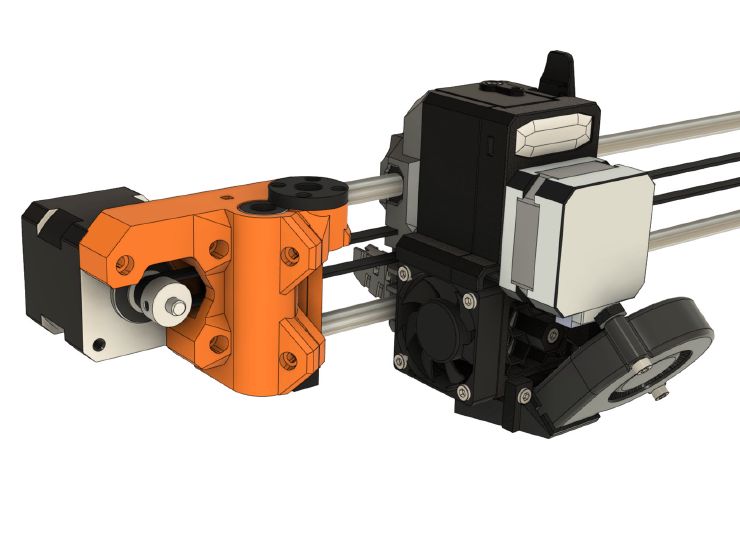
Bondtech BMG Prusa extruder on Bear X axis
Custom Bear X carriage attached to the Bondtech BMG extruder
Later, when E3D launched their Hemera extruder, I approached them about a potential partnership to create a version that would be compatible with the Bear X-axis. They accepted, which gave me the opportunity to explore the benefits of the ultra-short filament path introduced with this extruder. Due to the size of the Hemera, making it compatible with the Bear axis and Prusa printers was challenging, but I managed it and called it the BearMera.
BearMera on a Bear Upgrade Frame
Underneath the BearMera
BearExxa 2.0
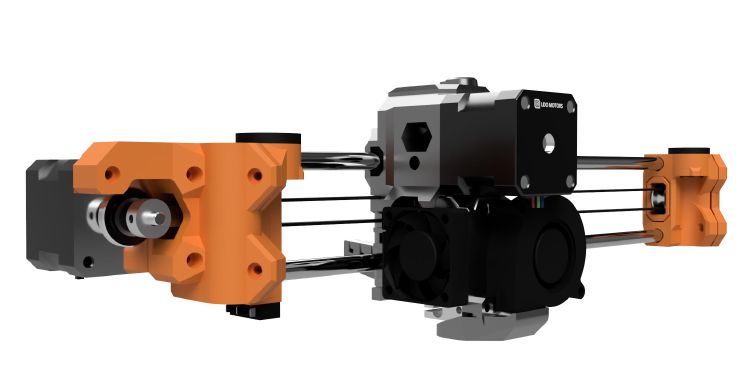
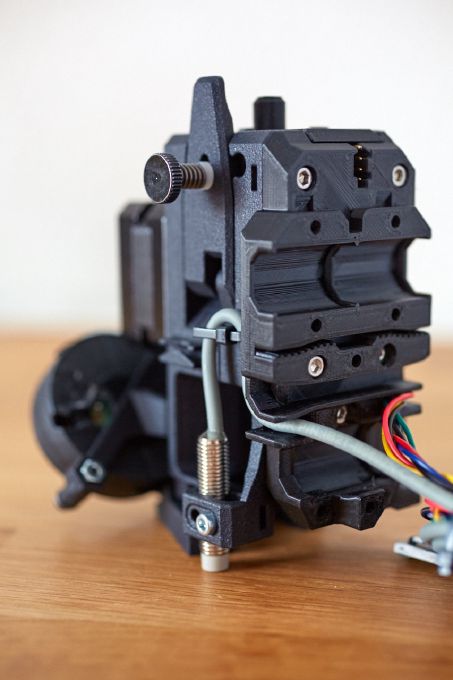
The BearExxa 2.0 improves upon the 1.0 in terms of both print quality and weight by using a single-stage spur gearbox and a lighter motor. This helps to solve the problem of repetitive artefacts generated by the motor steps and the non-concentricity of hobb gears. The gearbox is also simple and efficient, with low enough backlash to not cause any issues for our use cases. The motor is designed to generate sufficient torque in all conditions and to prevent the extruder cavity from overheating (which could affect the filament).
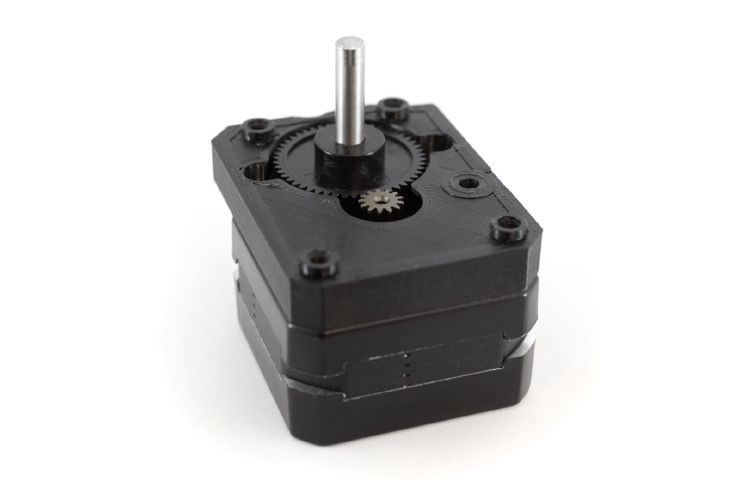
BearExxa 2.0 gearbox and motor
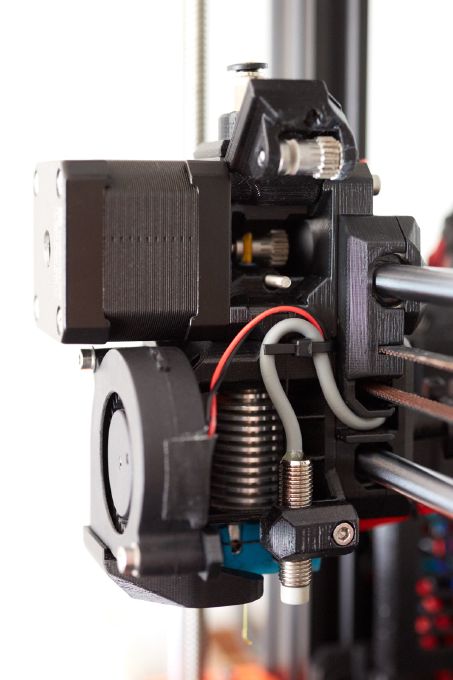
As this is a replicable open source design, special care is needed for the gearbox assembly. To ensure proper alignment and tolerances, I made several self-centring features to automatically position the gear and motor in the correct place. I then made sure that the assembly was easy, including for maintenance. By removing just four screws, access is gained to everything around the extruder: the gearbox, the filament sensor, the hobbed gears and the bearings. This process is simple, quick, and does not require any special calibration steps.
BearExxa 2.0 gearbox opening to access hobb gears, filament sensors, bearings and spur gears
The BearExxa 2.0 is built around an E3D Revo Micro hotend. I chose this model for its efficient heat break design, quick nozzle swap, low-mass ceramic heater, and for its CE, RoHS and REACH certifications. I could be a beta tester of this hotend and my testing of final design have shown a clear improvement in print quality.
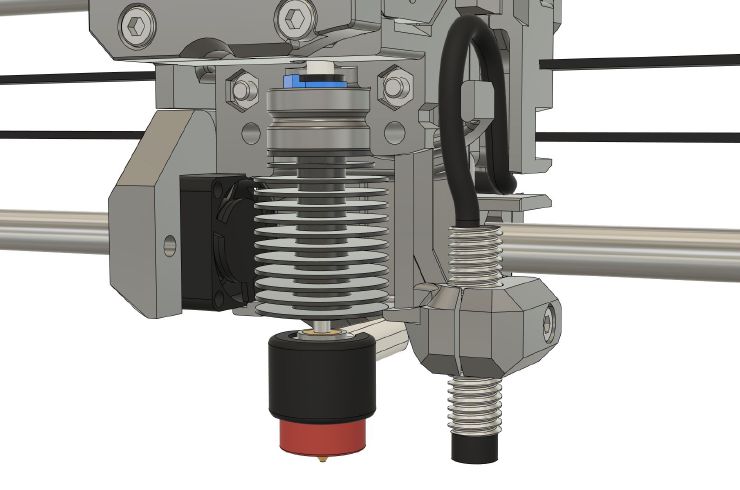
E3D Revo Micro hotend
Cooling the filament is always a challenging design to get right. While CFD was helpful in revealing some details, real-world testing remains a much more reliable approach.
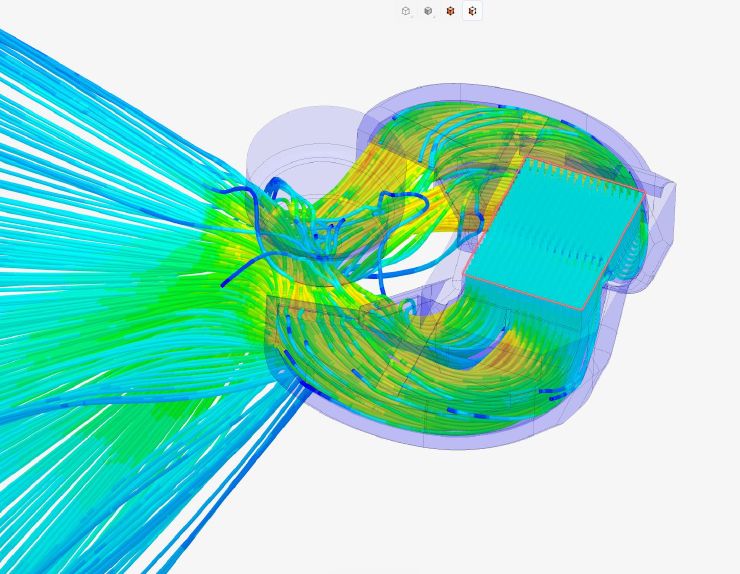
CFD simulation of the airflow velocity through the nozzle fan duct
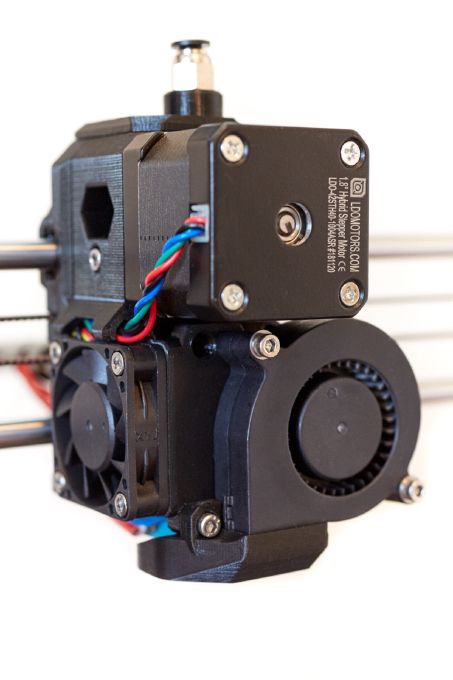
The BearExxa 2.0 is still a work in progress and is currently in the beta stage. The final version will include a custom motor with a concentric gear machined directly onto the shaft. It will be produced by LDO Motors.
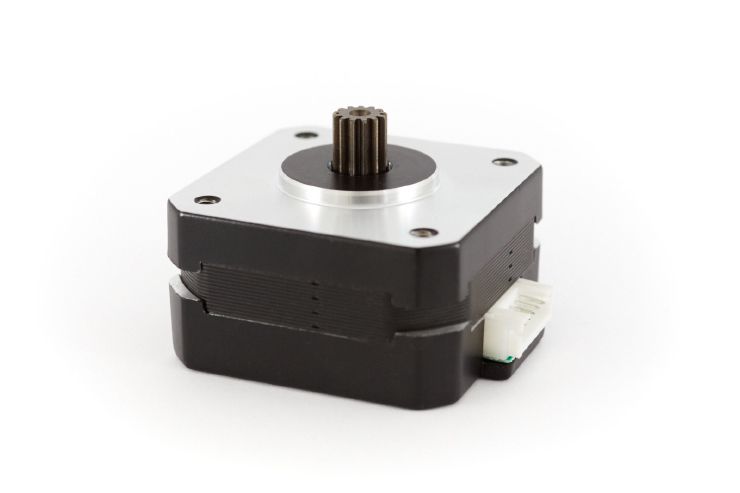
Custom motor with gear machined on the shaft directly
It is impossible to explain all the goals and thinking that went into designing this extruder here, but you can read more details on the BearExxa V2 Design Goals page in the GitHub repository.
Designed with care
Safety
The print head is arguably the most dangerous component of a 3D printer due to its high operating temperature (typically 200–300°C) and proximity to flammable plastic. As a designer, therefore, I felt responsible for ensuring that the product was designed correctly and safely. I chose certified hardware and took extra care with the wiring, hotend cooling, and the proximity of the printed parts to the hot block. Finally, I created detailed assembly guides and provided in-depth support to the community to minimise any risks that could be introduced during building and maintenance.
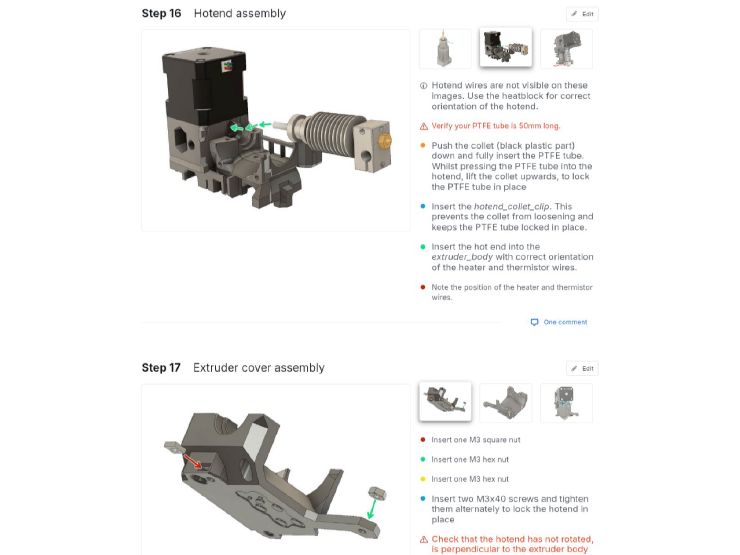
Screenshot of the BearExxa 1.0 assembly guide
Open source hardware
Careful design also means respecting the open source rules as the Prusa i3 was2 an open design. The Bear extruders are certified by the Open Source Hardware Association under the ID CH000026 and CH000027.
OSHWA Certification ID for BearExxa 1.0 (left) and 2.0 (right)
Recycled plastic
During the development of BearExxa 1.0, I decided to use recycled PETG plastic only. After some testing, I found that rPETG produced by Mitsubishi (sold under various brand names) was very similar to standard PETG and would not affect my design process or the printer’s performance. This filament is made from 100% recycled post-industrial plastic and contains a small amount of pigment for colouring. It is still my go-to filament today.
Links
BearExxa 1.0
BearExxa 2.0
In this article, print head, tool head and extruder are all synonymous terms. While the extruder is technically only the section that pushes the filament in a tool head, it is also common to refer to the entire tool as an extruder, since this is the part of the printer that extrudes plastic. ↩︎
GitHub issue #158 Native Source Files (Autodesk Inventor), article When Open Becomes Opaque: The Changing Face of Open-Source Hardware Companies by Adafruit, articles A(nother) Reply to Josef Průša and What Does an Open Source Hardware Company Owe The Community When It Walks Away? by Michael Weinberg, articles A reply to Josef Průša and Prusa Has Learned Nothing by Stargirl, article With Core ONE, Prusa’s Open Source Hardware Dream Quietly Dies by Hackaday. ↩︎